You do not need an expensive camera, a custom domain or a large stock of articles to begin. Draft one useful project explanation before committing to many paid tools. It will show what your site actually needs: step images, measurements, a materials list, downloadable files if relevant, and a clear way to correct an instruction.
Start a Blog Karan Singh BhakuniUpdated 3 Nov 2026
How to Start a Craft Blog: 9 Practical Steps
Karan Singh BhakuniUpdated 3 Nov 2026- 14 min read
- 10 sections
- 3 comparison tables
- 8 questions answered
The short answer
To start a craft blog, choose the readers and craft you want to help with, document a real project, and publish a tutorial that explains the materials, method and result. Choose a platform and a simple layout that make those instructions easy to read. Then check the article on a phone, share it where the audience is relevant and use questions to improve the next version.
Want the site rather than the reading? Build one free with Grigora
Contents10 sections
Read nextHow to Start a DIY Blog: Projects, Photos and Publishing
1. Choose a craft focus and a reader
Start with work you can explain accurately: for example, a technique you practice, a material you know or a kind of project you can document. Choose a reader’s skill level and likely equipment. “Beginner paper projects using common hand tools” sets different expectations from advanced garment construction or workshop equipment tutorials. These are illustrative focus ideas, not reports of projects completed for this guide.
| Possible focus | A useful reader question | Evidence to prepare |
|---|---|---|
| Beginner technique | How do I make this step or join? | Clear tool/material names, ordered actions and close-ups of the important change. |
| A project tutorial | Can I make this object with the stated supplies and skill? | Actual quantities, measurements, steps, outcome and limitations. |
| A material or tool review | What did this exact material/tool do in the work shown? | Version, actual use conditions, observations, relevant photos and untested scope. |
| A craft process or project journal | What changed during the work, and what did the maker learn? | Your own notes, revisions, failed attempts where useful and honest reflection. |
A small category plan helps when showcasing diverse craft projects. Begin with a focus you can sustain, then broaden when the material is ready. A narrow topic can make the editorial work clearer; it does not establish easier rankings or a profitable audience. Read other tutorials to find unanswered reader questions without copying their text, photographs or creative presentation.
2. Keep a project record as you make
Write down what you actually used and did. Memory after the finished photograph often misses an adjustment, waiting period or tool that the reader needs. Keep the draft and original image files together so each instruction can be traced to its evidence. Do not fill a missing observation with an invented result.
| Record | Useful detail to capture |
|---|---|
| Project and intended result | Name, purpose, skill assumptions and actual finished dimensions/size where relevant. |
| Materials | Exact type, dimensions/weight/quantity and relevant product/version. Distinguish what you used from a suggested but untested substitute. |
| Tools and setup | Needed tools, surface/workspace and manufacturer directions or precautions that affect the work. |
| Measurements and conventions | Units, cut sizes, seam allowance, gauge, stitch abbreviations or print scale when relevant to that craft. Define the convention before the step uses it. |
| Method | Actions in order, orientation, critical measurements, what each stage should show and related image filenames. |
| Time | Actual hands-on and waiting/curing/drying periods, separately when recorded. Use the manufacturer’s current directions where required; do not invent a universal drying time. |
| Adjustments and limits | What you changed, what did not work and what remains untested. A finished decorative item is not proof of durability, food safety or suitability for children. |
| Rights and relationships | Pattern/design/image source and applicable permission/license; gifts, sponsorships or affiliate arrangements to disclose. |
Match instructions to the tools, materials and intended audience. Follow current manufacturer directions and relevant guidance instead of declaring every craft “safe for all ages.” In the US, the CPSC Art and Craft Safety Guide is a starting resource for material hazards and age-appropriate use; the right precautions depend on the project. Do not improvise a hazardous process or omit a necessary precaution to make a tutorial look simpler.
3. Plan the photos a reader needs
A finished-project image helps a reader recognize the goal. Process images do a different job: they show the orientation, join, fold, stitch or surface change that words alone might leave ambiguous. Photograph meaningful checkpoints while making the project. You do not need a separate picture for every minor movement if it adds no useful information.
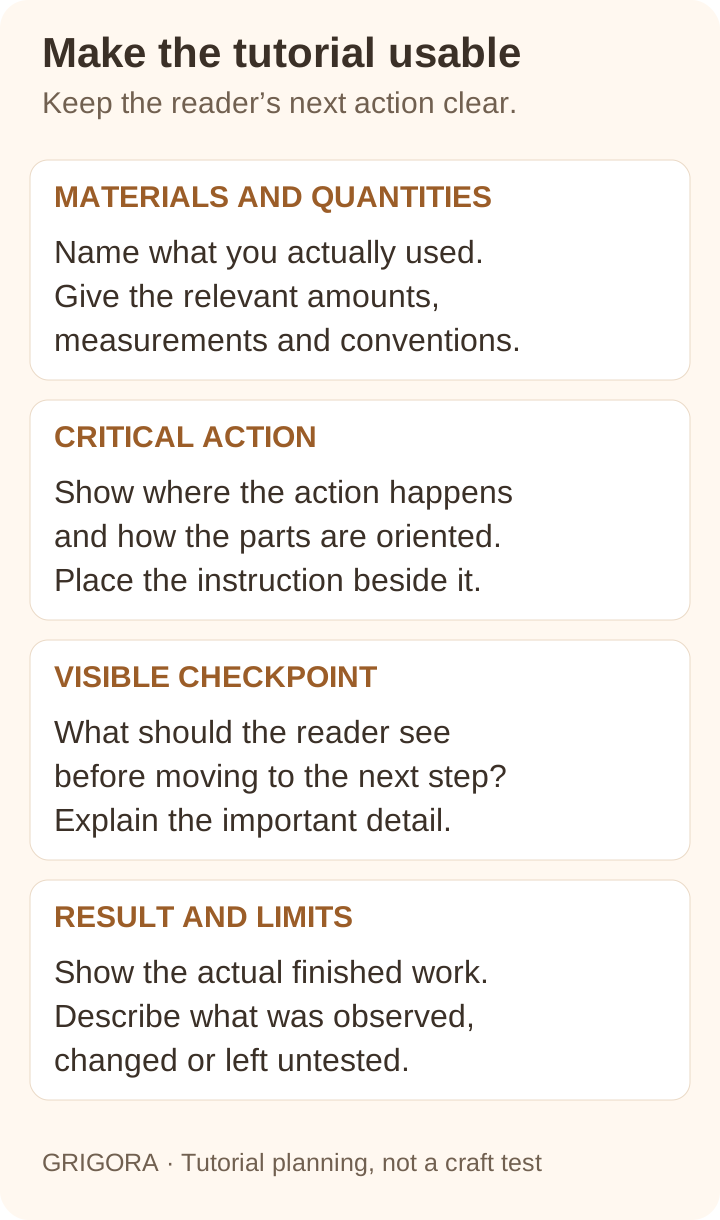
- Finished view: show the complete object clearly and give scale/dimensions in text where relevant.
- Materials/setup: identify the parts that could otherwise be confused; do not rely only on a product collage.
- Critical action: show where the action happens, the orientation and the feature the instruction refers to.
- Checkpoint: show the state the reader should compare with before continuing.
- Useful detail: a close-up of a join, edge, texture, fastening or known difficulty, if it supports the explanation.
Use a stable camera position, a clear background and lighting that reveals the detail being explained. Check sharpness at the intended reading size. Keep colors, textures and relevant defects honest; do not retouch away a result the tutorial discusses. Retain original files. If you recreate a missed step, make sure the recreation is accurate and explain any change that affects interpretation.
Use your own accurate photos or appropriately licensed material for the job it can support. A generated illustration can explain a concept if labeled, but it should not pretend to show a project you made, a tested tool result or a missing construction step. Important instructions, measurements and labels also belong in readable text.
4. Choose a platform, name and realistic budget
Test a long tutorial, a small image sequence, headings, a materials table and any download you plan to offer. Check the article on a phone and how you update an older version. Choose the platform for this workflow and ongoing cost, rather than assuming one builder is ideal for every craft blogger.
| Route | Check for your craft blog |
|---|---|
| Hosted platform such as WordPress.com or Blogger | Account/plan terms, provided address, media allowance, public/private publishing, display of tutorial images and any download or commercial restrictions. See WordPress.com features and Blogger setup. |
| Grigora website/CMS | Test your tutorial in the actual editor. Website publishing begins with a trial; paid website plans include hosting, SSL/CDN and domain connection. Check media limits and the exact store/download workflow you need. Current terms. |
| Self-hosted WordPress | Hosting, software updates, suitable backups/recovery and the person responsible for support. Check WordPress hosting guidance and the actual host’s terms. |
If a unique domain name fits the project, choose one readers can spell and check for confusingly similar brands before purchase. Domain availability does not establish trademark clearance. A provided platform address may be enough for a first version. Record registration/renewal, account ownership and recovery; domain registration and website hosting are related but separate costs.
Compare complete upfront and renewal amounts for the site, domain, optional tools, media storage and craft supplies. Include the time needed to make, document and revise work. Buy additional equipment or software when it solves an identified limitation; none establishes readership or commercial success by itself.
5. Build a site organized around useful projects
Use a readable article layout and a small set of categories based on craft, technique or reader task. Keep a route from the index to each tutorial and between related explanations. Helpful starter pages include an accurate About page, contact/corrections, and the actual privacy/disclosure information needed for the activities you use. Avoid empty categories and an elaborate shop before there is a supported offer.
For Grigora, use the instructions for your editor: AI-built sites use CMS collections and connected layouts, while classic visual-builder sites use the CMS and compatible blocks. The classic article guide identifies its legacy scope. Start with a real draft and inspect the index, article page, images, links and publishing settings before expanding the site.
Keep source text, original photos, permitted pattern files and the current published version organized. Understand what your platform can export or restore and keep suitable independent copies. For a downloadable template, use a clear version/file name and retain the exact version the tutorial describes.
Also worth readingHow to Start a Makeup Blog: 11 Practical Steps
6. Turn the project record into a complete tutorial
Give the reader the outcome, requirements and method before adding optional background. A short story can explain why you made a change, but it should not hide a necessary measurement or the beginning of the instructions. Use this flexible sequence and adapt it to the actual craft:
- Project summary: identify what the tutorial makes, intended skill/equipment and actual result/limits.
- Supplies and setup: list quantities, dimensions, tools, conventions and relevant precautions. Explain alternatives as tested or untested.
- Preparation: what must be cut, marked, printed, measured or prepared before the first construction step?
- Ordered steps: give a clear action, necessary measurement/orientation and a useful checkpoint with its image.
- Finishing and use: describe the actual finishing work and any relevant manufacturer/use limits.
- Troubleshooting and variations: explain difficulties you actually encountered or otherwise support, and distinguish a tested variation from an idea.
- Sources and updates: identify relevant rights/relationships, the pattern/tutorial version and any material correction.
An illustrative editing exercise: “Attach the side piece” leaves important questions unanswered. Replace it with the orientation, attachment method, measurement and checkpoint from your actual project notes, beside the matching image. Do not copy a made-up measurement or drying time from a generic example; this guide supplies an editorial method rather than a tested craft recipe.
For a printable pattern/template, specify page size, scale and assembly information where relevant. Check the file and any scale-check feature with the actual intended print process before claiming it prints at the correct size. Provide the necessary instructions in accessible page text too; a reader should not have to guess a dimension from a small screenshot.
Check copyright laws and the permissions relevant to pattern text, diagrams, artwork and photos. The US Copyright Office distinguishes ideas/methods from their protectable expression. Use your own writing/photos or suitable permission and keep the source/license record. Buying a pattern or naming its designer does not by itself grant permission to republish its PDF or images. Rights in a finished item, a design and instructional material can raise different questions; check the actual terms and applicable rules.
7. Review and publish a usable first post
Review the explanation against the actual notes and images, ideally with someone at the intended skill level. Ask them to identify missing information or an unclear step. If you conduct a real repeat attempt or reader test, record what was tested and changed; do not call the tutorial “tested by beginners” merely because someone proofread it.
- All needed materials, units, quantities and conventions are explained before use; images match the stated steps.
- Any claim about time, cost, durability or suitability has an appropriate basis and clear context.
- Source/permission and commercial-disclosure information match the actual arrangement.
- The phone and larger-screen versions have readable text, image labels, captions, links and tables without unintended clipping.
- Headings are logical, essential information is in text, and images have appropriate text alternatives. Try keyboard access and zoom; use a fuller accessibility review where needed.
- Downloads open, versions match, and a printable has been checked before its size/scale is claimed.
- The site/post is published to the intended audience and the final URL works as that reader. A signed-in editor view is not enough.
The W3C image guidance explains choosing text alternatives for an image’s purpose. In a craft tutorial, that can mean identifying the important alignment or visible state, with the full instruction in the adjacent text. Captions and transcript/text alternatives also help when a useful video or audio demonstration is included.
8. Share a useful excerpt and learn from questions
Use SEO (Search Engine Optimization) strategies that make the topic understandable: an accurate project/technique title, a distinct description, clear headings and relevant links. Describe the actual skill/material rather than promising an instant or universally easy result. A niche, article length or posting schedule does not determine a ranking outcome.
Choose a channel that fits the reader and your capacity. A useful image excerpt can lead to the complete tutorial. Pinterest’s current creation guide explains adding your own media and a link; check that the title, image and destination describe the same project. A profile, pin or weekly schedule is not a promise of traffic. Follow community rules and avoid publishing others’ images without the needed rights.
Invite a specific question: which instruction, material or photograph needs clarification? Keep a short correction log and update the affected step, image and downloadable version together. If a reader reports a failure, ask about the relevant material/tool/setup without assuming the reader is at fault or that your first explanation covers every condition.
Plan a cadence that leaves time to make, photograph, write and check. A small sequence of useful related tutorials can work better editorially than rushing a seasonal trend you cannot substantiate. There is no required three- or ten-tutorial launch collection. Track real referrals and questions, and review older links, files and product substitutions when details change.
9. Evaluate commercial options without weakening the tutorial
With affiliate marketing, check the program’s eligibility, actual commission/payout terms and whether the supplies are relevant. Identify the exact materials you used and avoid recommending a substitute as tested when you have not tried it. A link should not obscure essential instructions or determine a falsely positive verdict.
If selling your own products, define the item or file, dimensions/format, permitted use, delivery, support and refund/return terms. A kit, finished object, pattern and class have different fulfillment and safety/rights questions. Check the site/payment provider’s actual supported workflow before promising automatic downloads, recurring access or a particular delivery date.
Sponsored work should retain accurate observations, material details and useful limitations. For endorsements covered by US rules, FTC guidance calls for clear disclosure of relevant paid/free-product relationships where readers encounter the recommendation. Other applicable rules and program terms may differ. A general About-page note does not replace an appropriate disclosure with the recommendation.
Compare real income with supplies, site/software, equipment, fulfillment, fees and time. Advertising, affiliate links or paid patterns may be options, but none supplies a predictable earnings timetable. Decide what is sustainable for your project and keep the free/tutorial explanation useful to its stated audience.
Frequently asked questions
Choose a scope you can explain honestly from actual work and reliable sources. You can document learning, but label your experience and limits accurately. Do not present an untested method, safety claim or advanced result as expertise you do not have.
There is no required number. One complete useful tutorial can be a first version; prepare further posts when the work and evidence are ready. A larger collection does not automatically establish quality, approval or traffic.
Identify the intended result, skill assumptions, materials/quantities, tools, measurements/conventions, preparation, ordered actions and useful checkpoints. Add actual finishing/limitations, relevant rights/relationships and a way to correct or update the version.
No. Use equipment that shows the needed detail sharply with suitable lighting and framing. Keep original files and check images at the reader’s display size. Buy equipment for a specific documented limitation rather than an assumed traffic benefit.
Check the pattern’s terms and applicable rights before copying or republishing any text, diagrams, photos or files. Use original reporting and obtain needed permissions; a purchase or credit line is not blanket permission to redistribute. Finished items and instructional material can raise different questions.
A generated diagram can explain a concept if accurately labeled. It should not pretend to be a photo of a project you made, a tested material result or a missing step. Use accurate actual process evidence for claims about your work.
No universal schedule or channel fits every project. Allow time to make, document and check work, then share where the intended reader is relevant and follow that community’s rules. Measure actual referrals instead of assuming a weekly routine establishes growth.
There is no dependable timetable. Eligibility, audience, offer, costs and execution differ, and some blogs earn nothing. Keep commercial relationships clear, check fulfillment/rights and evaluate real results rather than expected affiliate or advertising income.
Practical writing on building a site, growing an audience and sending email people open. No more than one a week.

Karan Singh Bhakuni
118 articles on the Grigora blog
More on Start a Blog
Guides
How to Start a DIY Blog: Projects, Photos and Publishing
Choose a DIY focus, document a real project and build a simple blog. Use a project-record worksheet, photo plan and publication checks before promotion or monetization.
2 Oct 202310 min read
Start a Blog
How to Start a Makeup Blog: 11 Practical Steps
Build a makeup blog around useful tutorials and observations you can support. Includes a review worksheet, photo checks, platform choices, a first-content plan, and disclosure guidance.
28 Nov 202314 min read

Start a Blog
How to Start a Blog in Nigeria: 10 Practical Steps
A practical Nigerian blog launch guide: budget setup and renewals, choose a platform and domain, prepare original posts, test mobile publishing, and check current CAC, tax-ID, privacy and payment…
17 Nov 202316 min read