A DIY blog can share crafts, sewing, repairs, decor or other practical work. The most useful contribution is often the detail a reader cannot get from a finished-project photo: exact materials, the difficult step, what went wrong and where the method applies. Income can be a later choice, but it is not a guaranteed result of starting the blog.
Guides Karan Singh BhakuniUpdated 3 Nov 2026
How to Start a DIY Blog: Projects, Photos and Publishing
Karan Singh BhakuniUpdated 3 Nov 2026- 10 min read
- 11 sections
- 1 comparison table
- 5 questions answered
The short answer
To start a DIY blog, choose the projects you can explain responsibly, set up a simple publishing site and document one real project from materials to result. Write the steps from your notes, add useful photos, check the finished page and build a realistic plan for updates.
Want the site rather than the reading? Build one free with Grigora
Contents11 sections
Read nextHow to Start a Beauty Blog: Setup, Photos and Honest Reviews
1. Choose a DIY focus you can support
Start with a subject you know or can learn and document honestly. A beginner can share a learning process without presenting themselves as a qualified tradesperson. Define the reader and the type of project, such as small-space paper organization, basic sewing practice or decorative projects using materials you actually work with.
For craft-oriented blogs, a narrow first topic can help keep the first project manageable. Avoid trying to cover every tool, building material and household repair. A topic is suitable only if you can provide the evidence, permissions and appropriate review it needs, not simply because it is trending.
Set boundaries around safety. Do not treat electrical, structural, chemical or other consequential instructions as a matter of presenting competing opinions. Use current authoritative guidance, manufacturers’ instructions and appropriately qualified review. A disclaimer does not make unsupported instructions safe.
For one concrete example, U.S. EPA guidance for DIY renovations explains the risk of lead dust when disturbing lead-based paint in older homes and recommends lead-safe certified contractors for relevant work. Check the requirements and professional guidance for the actual project and jurisdiction rather than publishing a generic renovation method.
2. Plan a small site and budget
Compare a hosted builder and other publishing options against the work you need: readable tutorials, image handling, captions, categories, editing, exports, contact routes and any later shop or subscription requirement. Check the current plan, renewal costs and supported features. You do not need to buy professional camera equipment or a complex theme before testing one post.
Budget for the domain or provided address, hosting/plan, actual project materials, any tools, media preparation and maintenance. Separate what you already own from new spending. A low-cost publishing plan does not make the projects or your production time free.
If you use Grigora, follow the workflow available in your project. The Classic CMS post guide covers creating posts and preparing details; the newer AI editor differs. Confirm your actual media, contact and commerce needs separately. Do not assume the blog editor supplies built-in keyword research or every external integration.
3. Build the pages readers need
- Blog or project index: Clear project titles and categories that help people find relevant work.
- About: Your actual experience, qualifications where relevant and the scope of the advice you publish.
- Contact: A monitored route for corrections and suitable inquiries, with unnecessary personal details kept private.
- Resources, if useful: Tools/materials you can describe accurately, with relationships and limitations clear.
- Relevant notices: Privacy, commercial disclosures and other information appropriate to the site and activity.
Choose a readable layout rather than a particular “DIY aesthetic.” Use clear headings, accessible navigation, understandable link text and a phone-friendly page. Do not place important instructions only inside a decorative image or rely on color alone to identify steps. A simple, usable design does not guarantee search rankings or a particular bounce rate.
4. Keep a project record while you work
Document the actual process before writing a polished tutorial. Record materials, quantities, dimensions, conditions, changes and the result. Distinguish active work from waiting or drying time, and say when a price was recorded. Readers should know which details you measured and which are estimates.
Use the following as a blank project-record worksheet. It describes evidence to collect for your own work, not a project we have built or tested.
| Record | What to capture | Why it matters |
|---|---|---|
| Purpose and limits | Reader’s task, project type and conditions it is intended for | Prevents a small example becoming an unsupported universal method |
| Materials and tools | Exact relevant type/model, quantities, sizes and permitted substitutions | Makes the method understandable and differences visible |
| Process | Ordered notes, critical measurements and photos taken during the work | Reduces missing steps and reliance on memory |
| Time and cost | What was measured, what was estimated, waiting time and dated spending | Avoids misleading quick/cheap claims |
| Result and limitations | What happened, faults, corrections and what was not tested | Separates observation from assumptions |
| Sources and rights | Instructions/reference sources, photos, licences and any reviewer’s role | Supports claims and permitted publication |
If you change a material or skip a step, record it. Do not describe an untried substitution as equivalent. A project that did not work can still support a useful learning post if you explain the failure accurately and avoid presenting the method as verified instructions.
5. Photograph the explanation, not only the finish
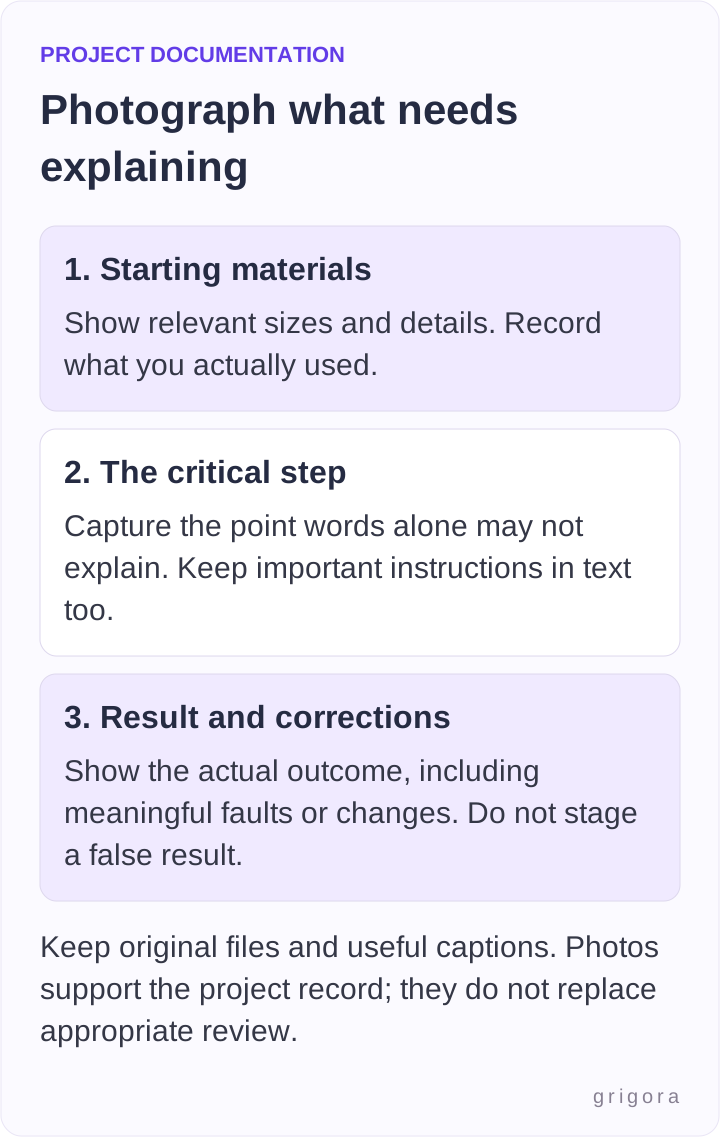
Capture the starting materials, the step that is hard to describe, the result and relevant corrections. Keep lighting and scale clear enough that readers can interpret the image. Do not stage a misleading before/after, hide a failure or substitute a generated scene for evidence of work you claim to have done.
Use your own photographs or material you have suitable rights to publish. Remove private addresses, documents and identifying details that do not belong in the post. Obtain appropriate permission before featuring other people or their work.
Write the important instruction in text, with images as supporting explanation. The W3C images tutorial distinguishes informative, decorative and functional alternatives. Describe the image’s useful meaning in context rather than repeating the article’s keyword. Video also needs suitable captions and access to essential visual information.
Also worth readingHow to Start a Nursing Blog: Scope, Sources and Publishing
6. Turn the record into a usable first post
Answer one clear question in the title and opening. State what the reader will make or learn, the conditions and relevant limits. Then provide the materials, prerequisites, numbered process, result, troubleshooting and source information that the actual project requires. A review or learning diary may need a different structure from a tutorial.
- Tutorial: Explain the method you actually followed and the conditions it was checked under.
- Tool or material review: Identify the item, acquisition relationship, actual use, observations and limits.
- Learning diary: Separate the experience from general advice, including what remains uncertain.
- Project collection: Link and credit sources appropriately; do not copy others’ instructions or images without suitable rights.
Do not label a project “beginner,” “safe,” “budget” or “30-minute” unless you can support what that label means. Check whether a reader could follow the process without filling in a crucial missing step. Seek relevant review when the subject calls for expertise you do not have, and state the review scope honestly.
7. Check the published page before sharing
- Read the article on a phone and desktop, including every step and table.
- Open each image and check that important details remain legible at the displayed size.
- Test links, navigation and the contact or correction route.
- Check materials, measurements, sequence, source links and any necessary qualifications against your project record.
- Verify disclosures, image rights, publication state and any intended email/notification settings.
This checklist is a test plan, not a claim that every reader’s project or site has passed. Fix missing evidence or unclear instructions before promotion. Do not repeat a hazardous process merely to create a better photograph or meet a publishing date.
8. Help interested readers find the work
Search Engine Optimization (SEO) starts with useful public pages that can be accessed and understood. Use specific titles, logical headings, descriptive summaries and relevant links. Do not add keywords to every caption or image alternative, buy ranking links or claim that publishing often guarantees visibility.
Share suitable examples where your audience already looks for them, respecting each community’s rules. A photo or short video can point to the complete instructions, but keep essential context and limitations clear. Guest contributions should follow the publisher’s terms; a backlink is not an automatic entitlement.
Comments, newsletters and collaborations are optional ways to stay in touch. Use a response channel you can maintain and appropriate permission for ongoing email. A correction or genuine reader question may be more useful than a large number of likes. Do not treat engagement as proof that a method is safe or effective.
9. Consider monetization after the work is useful
You may choose to monetize your blog through suitable affiliate recommendations, sponsorships, advertising, products or services. Eligibility, audience, provider terms, costs and actual purchases determine the result. There is no guaranteed income level or point at which a project archive becomes profitable.
If you recommend supplied or sponsored materials, explain the relationship clearly. U.S. FTC guidance requires honest endorsements and clear material-connection disclosure where applicable. Do not claim a tool was tested, a result is typical or a product has benefits you cannot support.
Options such as selling e-books or project guides also create responsibility for accurate instructions, permissions, support and updates. Recheck any measurements and examples, define what the buyer receives and account for production and service costs. Payment availability is not proof of demand or quality.
10. Maintain projects and a realistic calendar
A small calendar can support consistent blogging, but no universal weekly quota is needed. Leave time for the actual work, photography, research, review and corrections. Seasonal ideas can be planned in advance without rushing a project or presenting a trend as a safety recommendation.
Review material when a product, source, method or reader-reported issue changes. Correct material mistakes and clarify substantive changes. Keep the source record and image originals so updating a guide does not depend on memory. Retire or revise instructions you can no longer support.
Frequently asked questions
You can share clearly identified projects and learning experiences within your competence. Credentials and professional review matter for subjects that need specialist knowledge or authorization. Do not turn a personal trial into unsupported safety or technical advice.
Choose a manageable question you can answer with an actual project record, useful photos and appropriate sources. A learning diary or honest review can be suitable; the first post does not need to cover every topic.
Use a sustainable cadence that leaves time for the work, evidence, media and review. There is no universal once-a-week requirement. An update to an important existing guide may be more useful than a new post.
Illustrations can explain an idea if clearly identified and accurate, but they must not be presented as photos proving a project you performed or a result you observed. Use actual evidence for tests, measurements and before/after claims.
Potentially, through suitable programs, products or services. Account for materials, production, fees and maintenance, and disclose relevant relationships. Starting a blog or publishing frequently does not guarantee revenue.
Choose one project you can explain responsibly and start its record before drafting the post. Publish the useful details you can support, then improve the guide when real evidence or feedback gives you a reason to update it.
Practical writing on building a site, growing an audience and sending email people open. No more than one a week.

Karan Singh Bhakuni
118 articles on the Grigora blog
More on Guides

Start a Blog
How to Start a Beauty Blog: Setup, Photos and Honest Reviews
Choose a reader, build a simple site and publish beauty content with original photos, a transparent review record and clear limits on your claims.
30 Sept 202310 min read
Start a Blog
How to Start a Nursing Blog: Scope, Sources and Publishing
Choose a useful nursing-blog purpose, protect professional boundaries and build a source-review process. Then plan the site, first posts, access and realistic promotion.
22 Aug 202310 min read
Start a Blog
How to Start an Art Blog: From Studio Notes to Useful Posts
Build an art blog around work you can explain. Choose a reader, document your process, prepare useful images and captions, and publish with a maintainable routine.
7 Nov 202312 min read