
Unlike most of the other CMS platforms, Grigora allows you to create and edit your website layout and design as per your needs. Even if you’re not using the CMS feature of Grigora, you can still use the website feature to create standalone landing pages for your super projects!
We have an out-of-the-box drag-and-drop website building with tons of settings to customize more. Whether it be animations or advanced no-code customizations, it all can be done with a few clicks within Grigora.
What is a Website Editor?
The Website Editor is a tool that allows you to edit and publish your website layouts. Along with layouts, it can help you to create landing pages with advanced styling. Let’s say you want to create a custom homepage or any other page on your website; this is the tool you’ll use.
How to open Website Editor?
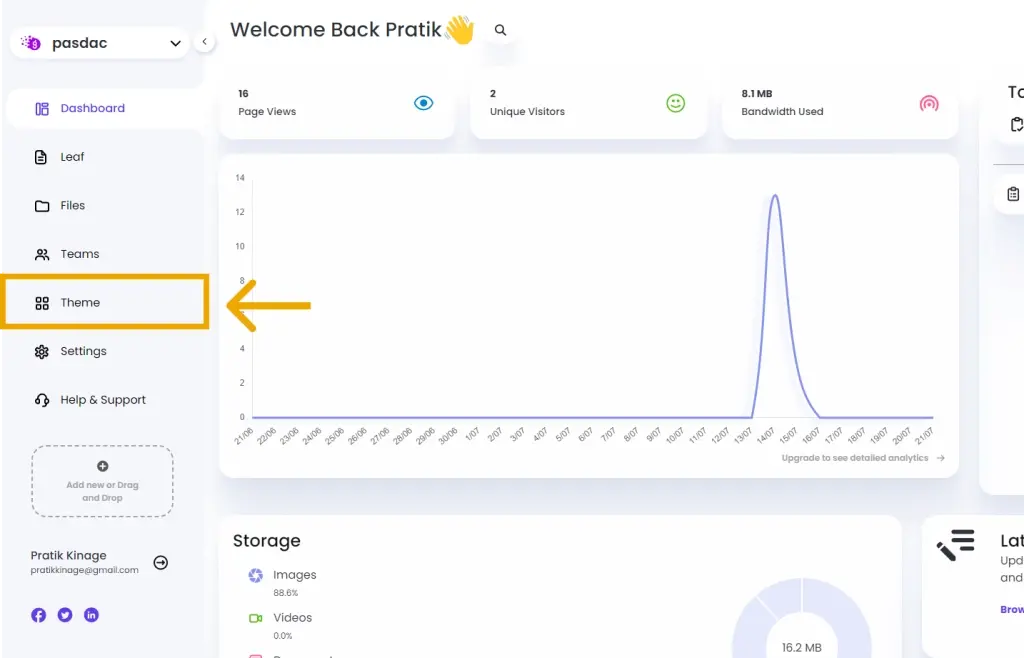
Once inside your Project Dashboard, you can see a navigation bar on your left-hand side. Over there, you’ll find a Themes option. Click on it, and it will take you to the Themes page.
Here you can edit your current theme or just import a completely new one. For the sake of this tutorial, we’ll only customize the existing theme.
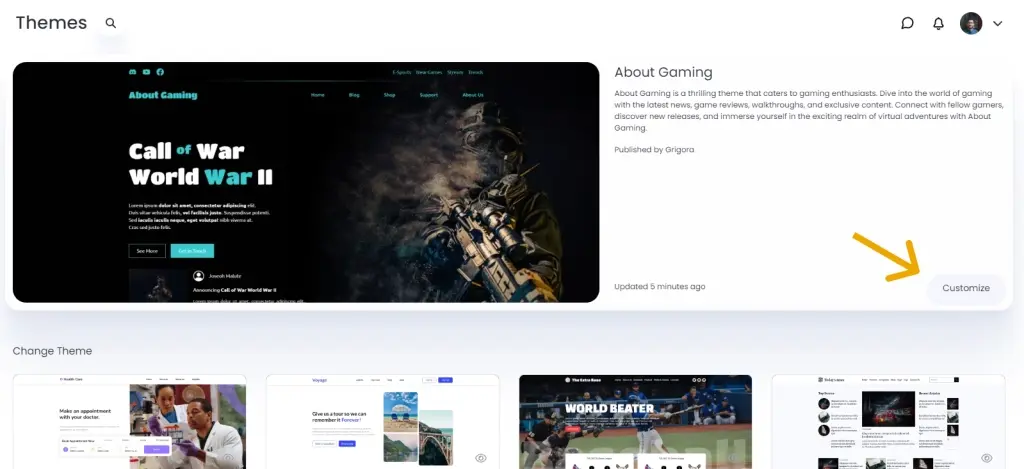
Check on the Customize button, and it will take you to the Website Editor.
Understanding the Website Editor
If you’re new to website development, this editor can be overwhelming to you. But fret not; we’ll try our best to make you understand this editor completely by the end of this tutorial.
Let’s start by breaking down the editor into multiple parts.
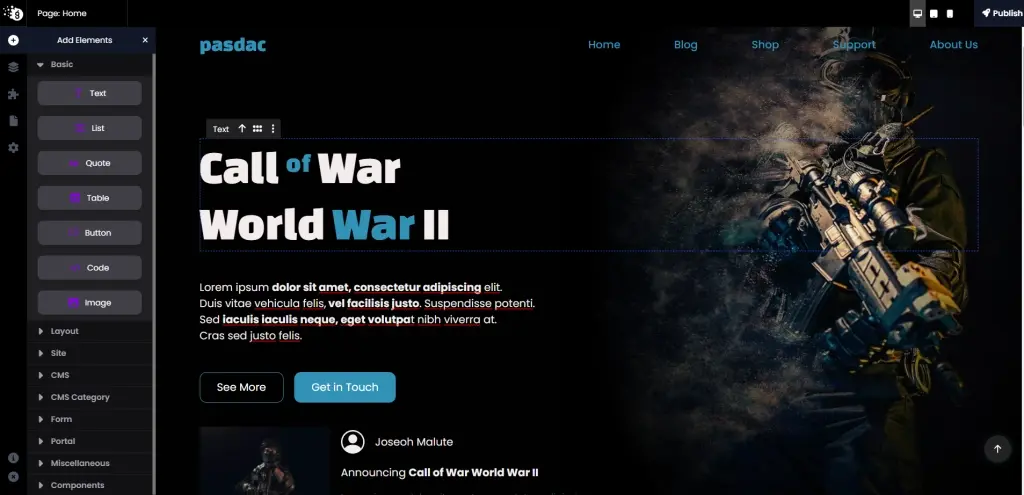
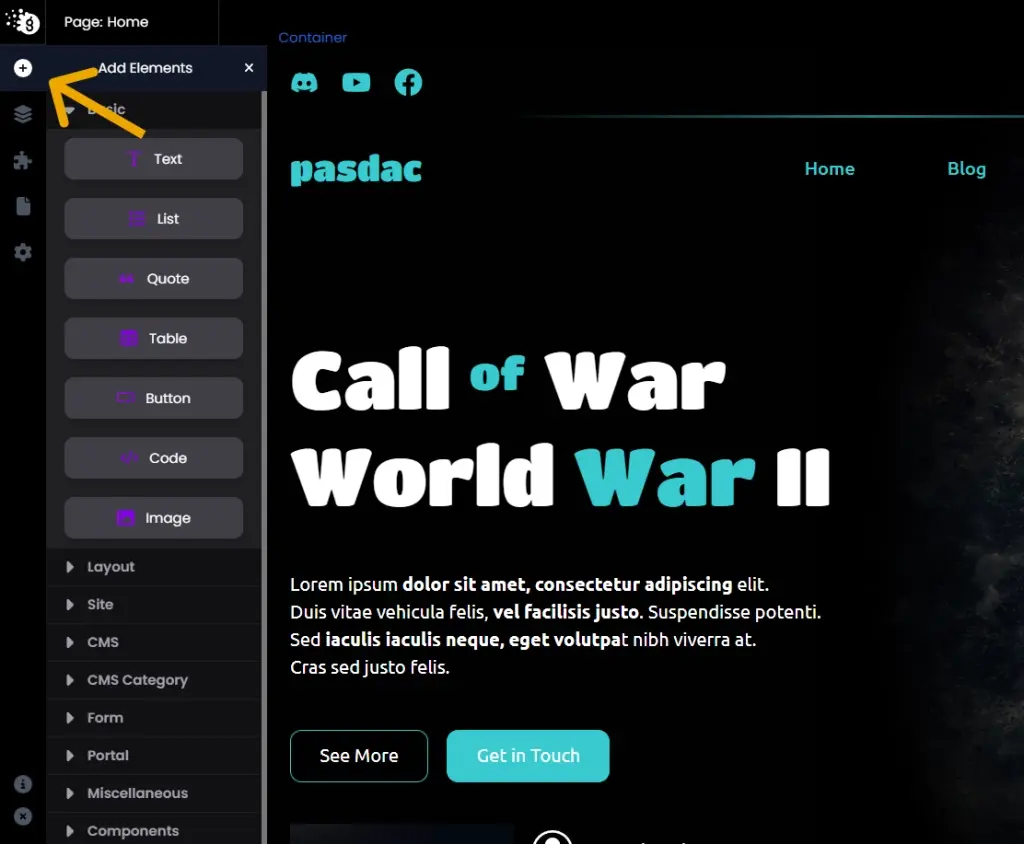
On the very left section of your screen, you’ll see a thin panel. This panel has a few buttons on it and will open up a sidebar once you click on these buttons. Let’s go through these buttons one by one.
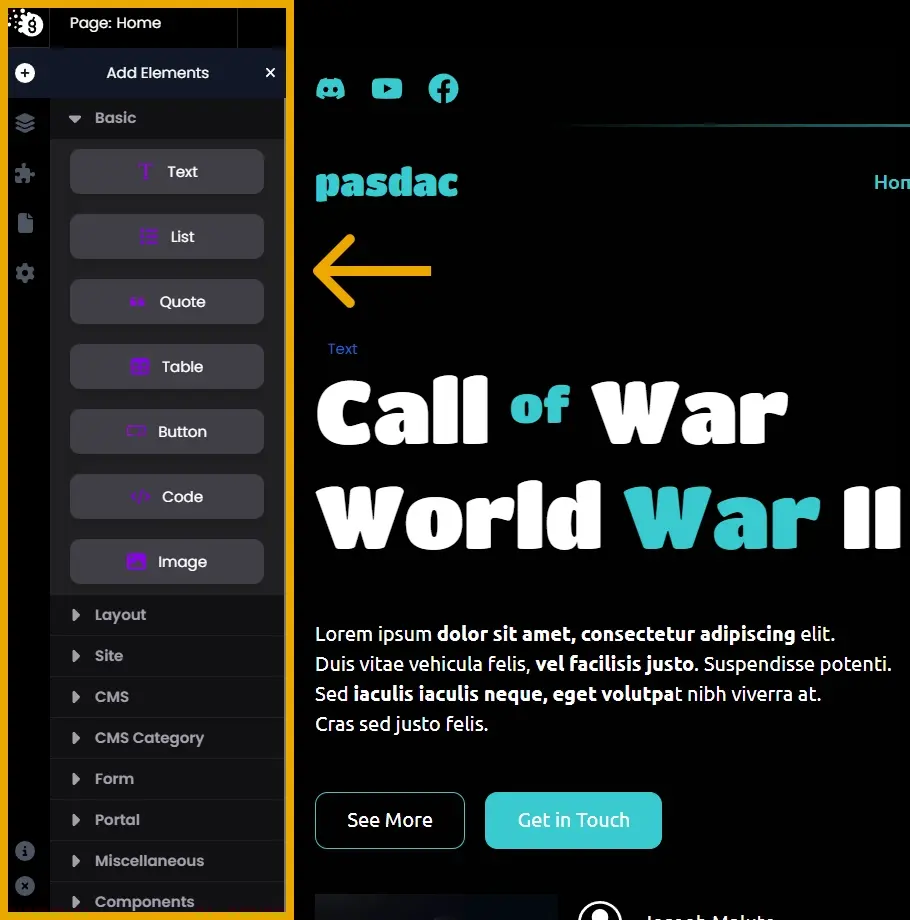
Blocks
Blocks are the basic building part of your website. Each block has its own purpose, UI, and settings. You can consider the block as a cell of your body. All of these blocks togetherly will make up your website.
Over there, you can find Block like Text, Image, Container, List, Columns, and more. Till now, we have more than 50 blocks, and all of them are unique to their purpose.
You can drag and drop these blocks into the middle part where your website is shown, or you can single-click them to add as well.
Pages

You can create multiple pages of your website in the same website editor. These pages are shown in this Pages section. Here, you can add, edit, duplicate, or delete pages from your website.
Exception: You cannot delete the homepage of your website.
Clicking on a specific page will open the page in the middle part, where you can drag and drop blocks.
While adding a new page, it will ask you to enter the page name, slug, SEO Title, and description as well.
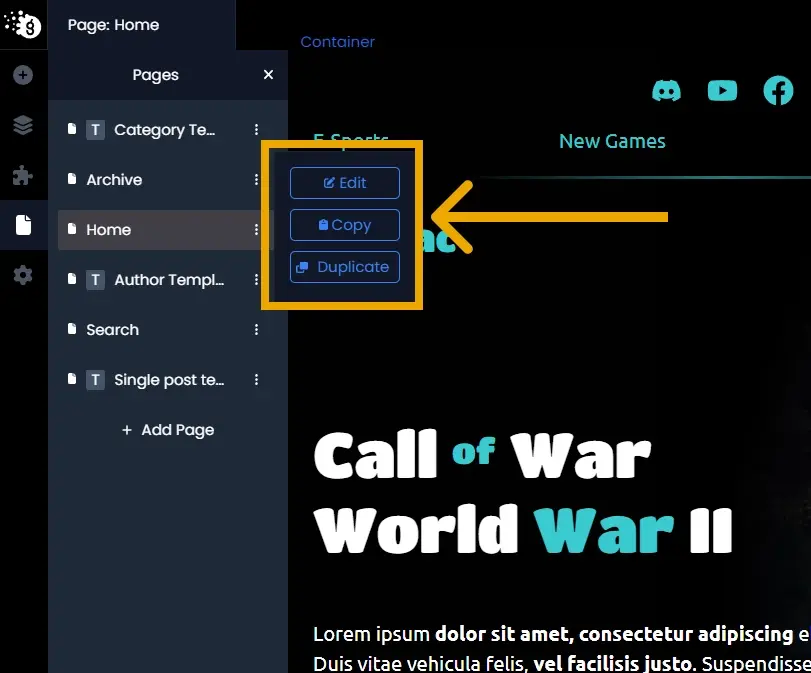
Note: Deleting a page is an irreversible action and deletes your page permanently. We’ll soon be adding a backup feature where you can recover deleted pages.
Components
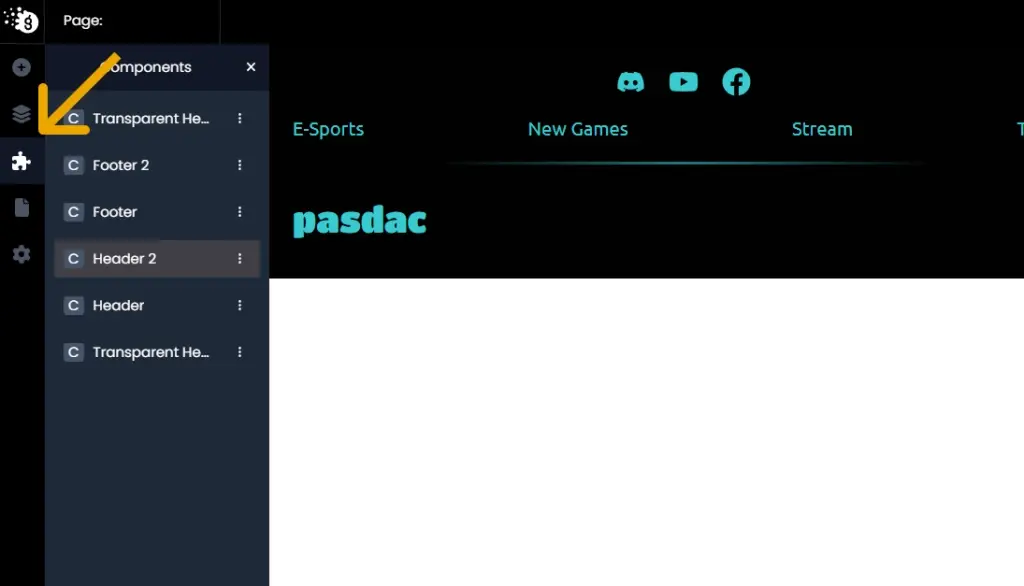
Components are reusable blocks that you can drag and drop again and again to replicate the same UI. Components can be used inside a single page or across multiple pages. For example, you can create a header component and use it on all of your pages so that if you ever want to change something in the header, you’ll only have to change it in the component, and the change will be reflected in all the pages.
Note: To create a component, you’ll have to select a Container block, then open Advanced Settings and click on Create Component button.
Once components are present on your website, you’ll have an option of Components inside the Blocks panel as well.
Layers
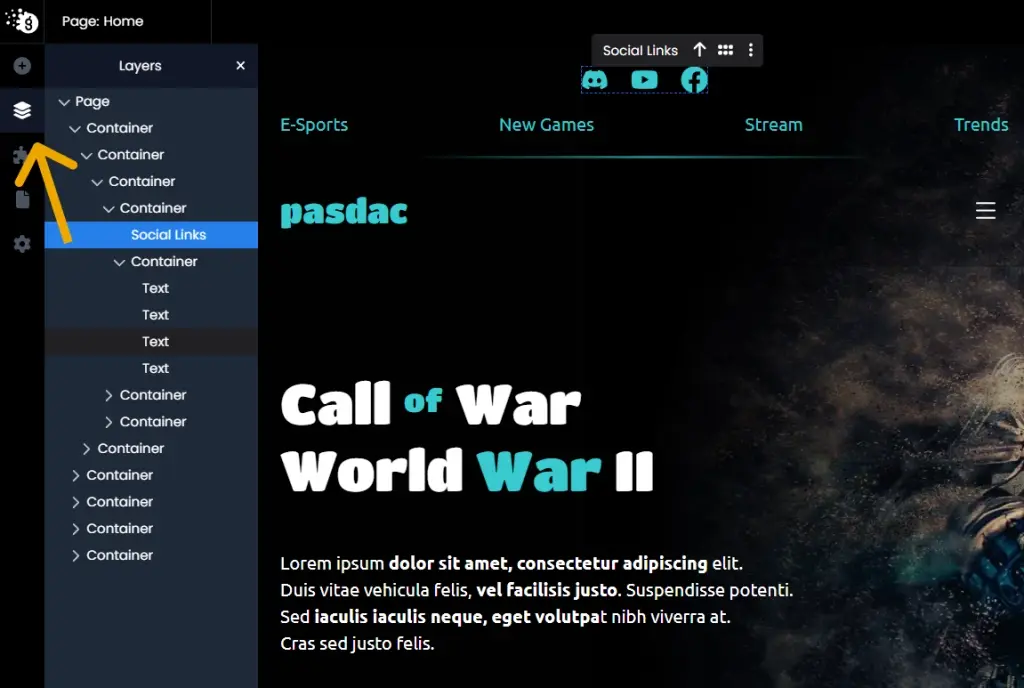
Layers are layout overview of your page in terms of Blocks. You can use this to analyze which block is present where and how your website is structured.
The first block in Layers is “Page,” and it will be present all the time. Consider it as a canvas of the page that you are creating/editing.
Inside it, you can find all the blocks. Few blocks support nested blocks i.e. you can place more blocks inside it (like Container Block). These nestable blocks will have arrows beside them in layers and can be used to expand or collapse view the inner blocks.
Upon hovering the block, you can see the block being highlighted in your editor. Also, on selecting it, a specific block will be highlighted and selected in the editor zone.
Settings
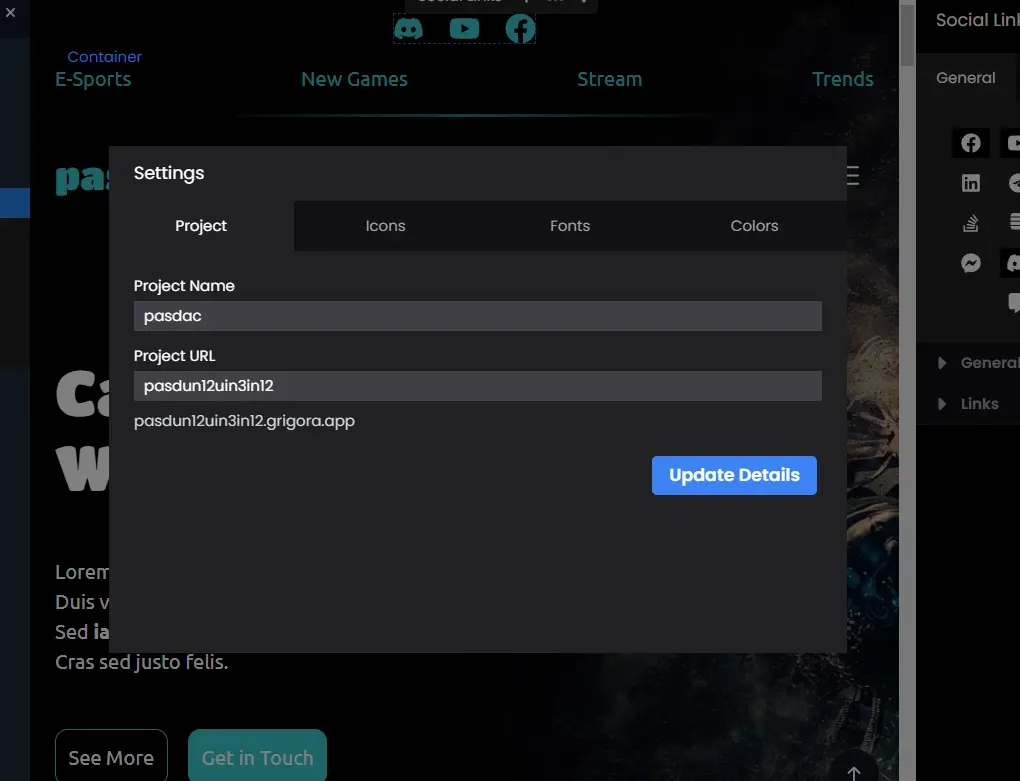
The last button in the left panel is for Settings. By Settings, it refers to the whole Website Settings.
Clicking this will open a Modal with a few tabs on it. Here you can change the website’s name and description, change icons, logos, and fonts as well.
Along with this, here you can declare the website’s color palette. The color palette is very useful for maintaining your website’s theme.
This is because, let’s say, you change the main accent color from purple to green everywhere on your website. If you have defined the accent color in settings, you can change it only there, and it will reflect throughout your website.
Top Bar

The very top bar of your screen has options to select a page, change the device-specific previews of your editor, and publish the website.
Clicking the publish button will give you the option to save your changes or save and publish your changes. Once you click on publish, it will auto-optimize your pages and then deploy them. You’ll get a notification in the bottom left once the publishing process is completed.
Right Side Settings
The right side panel is dedicated to block settings. Remember, every block has different settings? So all these settings will be available over here. We’ll have a look at this in detail in the Editing Block section.
How to drag and drop a block?
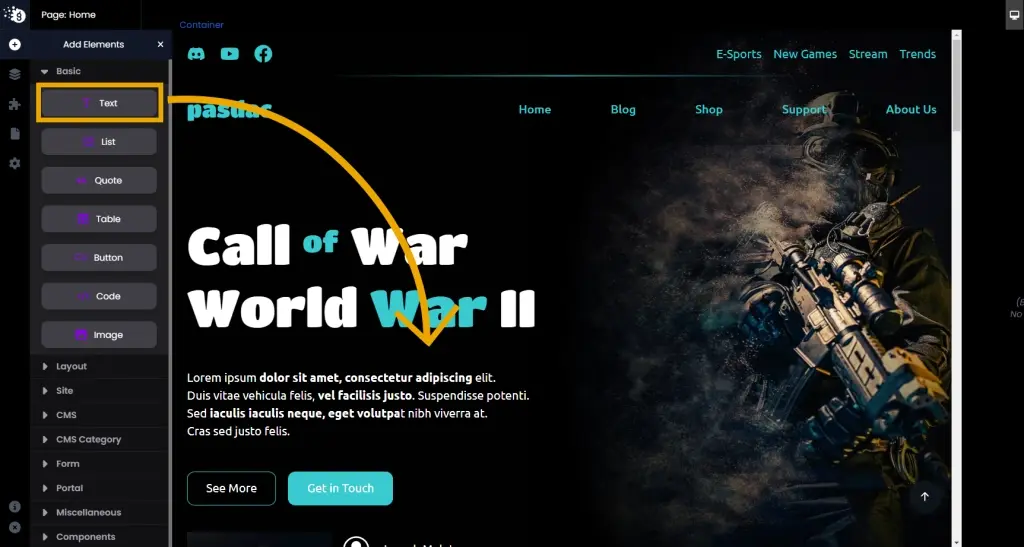
Let’s start by adding a block to your website. To do so, click on the Blocks button from the left panel and select any block which you want to add. Then select and block by holding your left mouse button and then drag it wherever you want to place it on your website.
While dragging, you’ll also get to know where it’s exactly going to be dropped with a blue-colored line.
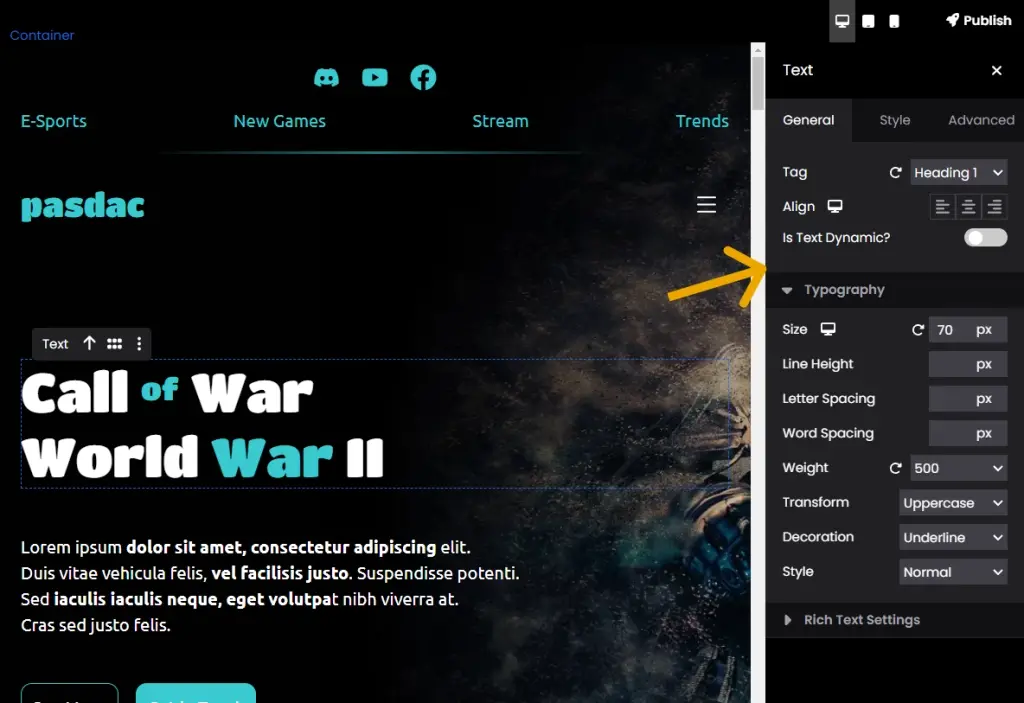
Editing a Specific Block
Once you’ve added a new block, you can edit this block as required. To do so, first, you have to click on the block in the website editor. Then a toolbar will appear on top of it. If it’s present, then you’ve selected it properly. Otherwise, you’ll have to try again.
Once the block is selected, the right side panel will also update with that specific block’s setting.
Also, if the block has an editable text field (for example, in the Text block, List Block, and others), you can directly click on the field and start typing over there.
Let’s understand the settings panel in depth –
General

General Tab has core settings related to respective blocks. For example, the Container block will have display and dimensions, the Form block will have submission actions, the Columns block will have a number of columns setting, and likewise.
Styles
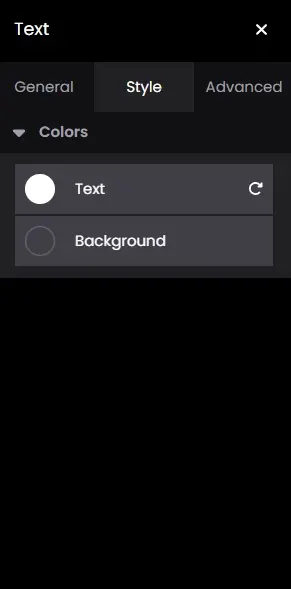
The Styles Tab has settings related to colors and backgrounds. As per the block, settings will be available over here to change the coloring visuals of the block.
Advanced
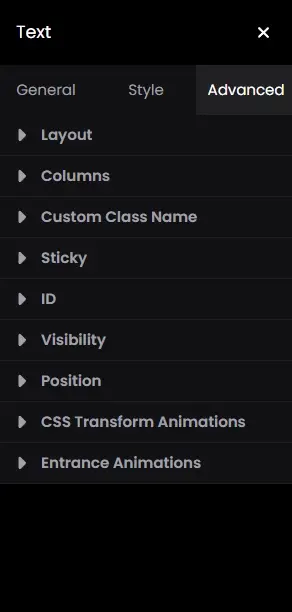
Advanced Tab is reserved for advanced CSS options of the block. Here are a few of the types of settings you can find here –
Border
Box Shadow
Filters
Padding/Margin
Sticky
Animations
Visibility
Toolbar Options
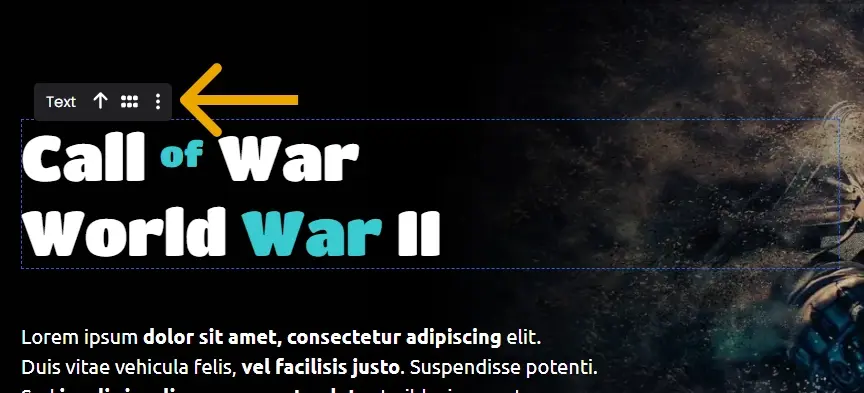
Along with the right panel settings, every block has a toolbar that has a few options on it.
The up arrow beside the name of the Block is for selecting the parent block of the current block.
The dragging dots beside the up arrow are for dragging the block and changing its position on the website. If you want to change the position of the block, you can directly hold this and drag it wherever you want.
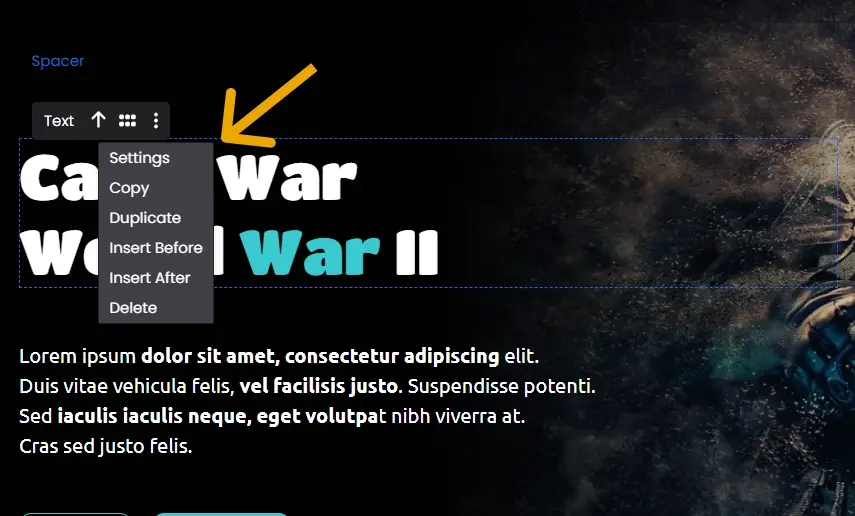
Along with these two, there are a few more options in collapsed options. These are –
Settings: To open the settings of the block in the right side panel.
Copy: Copies the block to the clipboard. You can paste the copied block wherever you want.
Duplicate: Duplicate will add the exact same block with the same settings next to your selected block.
Insert Before: Add a text block before your selected block.
Insert After: Add a text block after your selected block.
Delete: Deletes the selected block. If the block contains more blocks inside it, all of them will be deleted as well.
How To Publish Your Website?
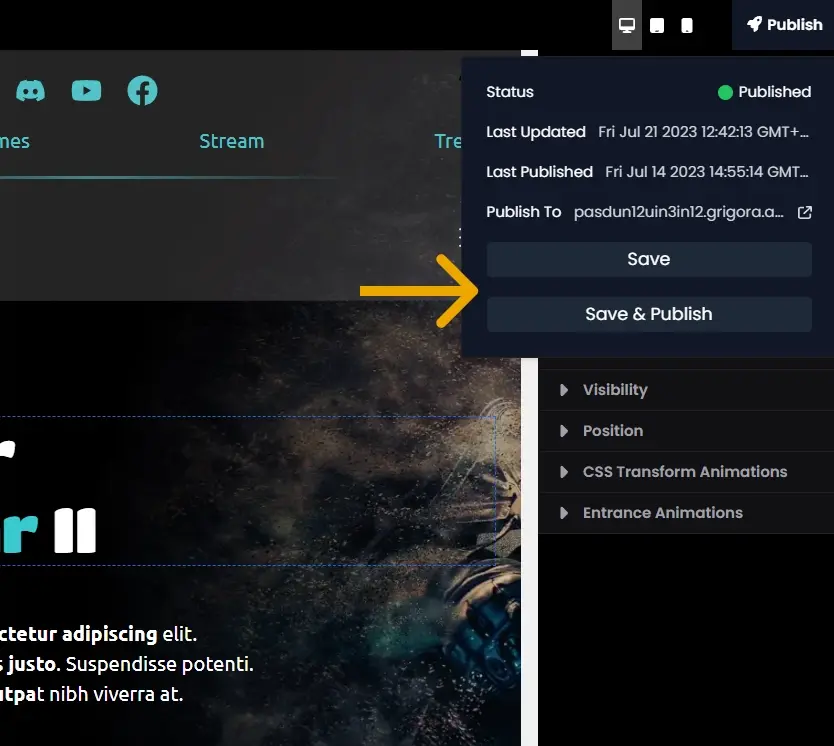
Once you’ve completed editing your website. You can publish it by clicking on top right publish button.
Clicking the button will open up a dialogue asking you to ‘Save’ or ‘Save and Publish’. Click on ‘Save and Publish’ and wait for it to become live!
Once it’s published, you can click on the URL above it to open the website.
Conclusion
With its drag-and-drop functionality, you can effortlessly add and arrange various blocks to construct your website’s layout. The extensive collection of pre-designed blocks, such as Text, Image, Container, and List, offer flexibility and versatility in building your web pages. Furthermore, the ability to create components enables you to reuse blocks across multiple pages, simplifying the process of maintaining consistency and making updates.
The Website Editor also offers valuable features like the Layers panel, which provides an overview of your website’s structure, and the Settings panel, where you can customize the appearance and color palette of your entire website. Additionally, the option to create landing pages independent of the CMS functionality makes Grigora an ideal choice for standalone projects.
In conclusion, Grigora’s Website Editor empowers users to unleash their creativity and build visually stunning websites without the need for coding. With its comprehensive set of tools, user-friendly interface, and extensive customization options, Grigora simplifies the website development process and ensures that users have full control over their designs. Whether you’re a professional looking to create intricate web layouts or a beginner venturing into the world of website building, Grigora’s Website Editor is an excellent choice that enables you to bring your ideas to life.
Start designing your dream website today and unlock the potential of this powerful platform!